Showing posts with label Trish Hernandez. Show all posts

Friday, February 6, 2015

Fun with Friends


I love getting together with friends for a night of open crafting.  Last week proved to be no exception.  Five  of my hostess club members came for a "freebie" night to work on personal projects.

Deb has volunteered to create wedding shower invitations for a friend.  The theme is "To the moon and back" with silver and navy for her colors.   Deb fashioned the dress following a tutorial she found online.  From there we developed a card sketch and the details just seemed to fall in place.  All present declared it a success!


Linda needed a card for a guy friend who is a football fan.  Pulling out a retired set from long ago and suggesting a possible card sketch was all she needed, and Linda was on her way to making her own work of art!


Meanwhile Pat worked on Christmas cards (!), Karen put the Big Shot to good use, Teresa shared some of the cards she's been working on.

All to soon the evening came to a close (the time just flew by!).  We all had such a good relaxed time with each other, we are going to do a similar get-together on the 5th Friday of March.

And THAT is why I am a Stampin' Up! demonstrator.  I love our products and think they are the best in the industry, hands-down.  I enjoy the financial benefits as well.  But it is the relationships that have developed as a result of signing up 6 years ago that are most precious to me.  I love each of my ladies, and thank the Lord for bringing them into my life.


Thursday, April 3, 2014

Storybook Friends notecard

It has been a long and challenging few months that kept me from posting any of my cards.  But I am feeling better and am getting a better handle on my new computer.  Though I still am not skilled with the photo taking and editing, I want to get back to sharing with you some of the joy of stamping on a regular basis.

During my absence from blogging, I have really taken a liking to simple, quick and easy cards.  Stampin' Up! Note Cards  & Envelopes (131527) are ideal for this technique.   Such as in this card for today:


I love this little dog from the Storybook Friends set.  Stamped in black, and color-highlighted with ink color of your choosing and blender pens, you can whip out a whole set to have on hand for all sorts of occasions in a short amount of time.

Note Cards come 20 to a package, with 20 envelopes to boot.  Though somewhat smaller than an A2 card, they do not require additional postage, and are a real bargain at only  $5.95 a package.  I highly recommend them!

Thanks for spending part of your day with me.
Happy stampin'!

Trish


Friday, March 1, 2013

SOMETHING OLD into SOMETHING NEW

Last week my friend Deb stopped by for coffee and a chat.  It was her day off; so naturally we just had to "play".  Neither of us had a specific project in mind, so I pulled out all the bits and pieces left over from other days and other projects --  punch outs, ribbons, scraps and stamped images.  Stamps, inks, and adhesives at the ready we spent the next hour or so simply playing.  The card base could be new, stamping and using punches to reshape elements into usable shapes and layouts, was acceptable; but for the most part, it was root around in the scraps and see what you find.

I love watching Deb work. She literally scrounged around in the boxes, mind open to the possibilities, and before you knew it, she had created yet another card.

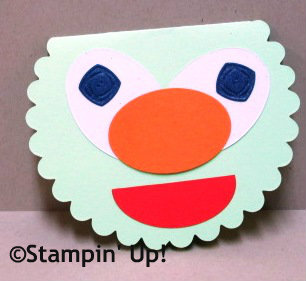
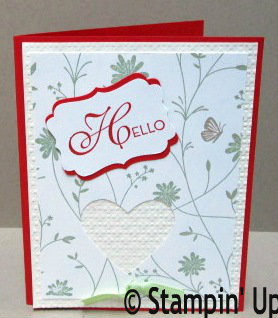
Here's what she came up with:

just clowning around

The elements were all there, but it took the artist in Deb to pull out their hidden beauty.

Don't you just love the heart window Deb punched out of the stamped mat to expose the textured mat beneath?


Stuck for an idea for a card? Time limited too?  check out your scrap box -- you never know what great card in waiting there for you to discover it.

Happy Weekend!
Trish

Monday, October 15, 2012

PINK for TODAY

Hi Stampers,
Thanks for stopping by.

It's time for another "pink is for National Breast Cancer Awareness Month" card.


 I had so much fun making this card and hope you will give it a try.  To make it, you will need:

card stock                                                                       ink pads
Pretty in Pink (card base and doily)                                  Pretty in Pink
Whisper White (mat and sentiment)                                  Wisteria Wonder
Wisteria Wonder (mat)                                                     Lucky Limeade
                                                                                        Basic Black

tools                                                                                stamp set
XL Oval Punch                                                                Lovely & Lacy
Lg Doily Sizzlit die
Big Shot                                                                           ribbon
brayer                                                                              5/8" White Organza

Special Hints:
1.  After die cutting the doily, use your paper snips to trim off the outer ring for just the perfect size for this card.
2.  Customize your ribbon by inking up your brayer and wheeling over your ribbon,  The more ink applied the deeper the shading.  Here I used Pretty in Pink.

I love making note cards like this. Just add your own personal message inside and pop it into the mail for so many different kinds of occasions -- or no occasion at all. (smile)

I also love hearing your feedback.  If you are viewing this in your email, you will come to my blog.  To do that, just click on today's title at the top of this post.  Then scroll down to the comments box below my blog post for today.  Hope to hear from you soon and often.

Until the next time, Keep on Stampin'!
Trish


Tuesday, October 9, 2012

SYMPATHY in PINK


Hi Stampers,
Welcome to my blog. Today's card design was pulled from my stash and chosen for its "pinkiness" in recognition that October is Breast Cancer Awareness month. Early detection saves lives, so be sure you get your annual screening done.

The card's design is suitable for many occasions.  By changing out the sentiment and colors, you can create a stash to have on hand for life's planned and unexpected times.

To make this A2 card, you will need:
card stock:  Whisper White, Basic Black, Regal Rose
stamps:  Just Believe, Teeny Tiny Wishes, Thoughts and Prayers (inside)
ink:  Certainly Celery, Regal Rose Stampin' Write markers
        Basic Black, Regal Rose classic stampin' pad
ribbon:  1/4" Black Grosgrain (retired), but  3/8" Taffeta would be a lovely substitute
tools:  Perfect Polka Dots textured impressions embossing folder, Big Shot, cutting mats, platform (no tab);
        1-1/4" & 1-3/8" circle punches; paper snips
adhesive:  SNAIL, stampin' dimensionals

To add extra texture to the bottom Regal Rose mat, use the Diagonal Plate on the Simply Scored.  Score  every 1/2" one direction, then rotate CS and score again to create a diamond pattern. I like using the debossed side as a contrast to the Perfect Polka Dots on the white mat.

Until the next time, think pink and keep on stampin'!
Trish


Saturday, October 6, 2012

WORLD CARD MAKING DAY

Hi Stampers!
It's World Card Making Day -- hurray!
Let's celebrate our creativity!

 created by Trish Hernandez, images ©Stampin' Up!

Both dry and heat embossing and dimensionals make different elements of the card pop -- especially in person ( my photographer --gulp, me!-- needs a tutor)

I am pretty sure my grandson will love his birthday card.

Until the next time........
Zoom-zoomin' out,
Trish

Thursday, October 4, 2012

STOP & CROP

Hi Stampers,
Thanks for stopping by.

Did you notice that I changed the wallpaper for my blog to pink in honor of Breast Cancer Awareness Month?  Even though I tend toward earth tones, I am really enjoying playing outside my comfort zone.

My friends know that I love card making and find working on scrapbook pages way more challenging.  (Stacks, drawers and boxes of pictures waiting around to be used are the blatant evidence of this.)  Today's share features products that make the task so much easier.

Stamp with Trish, ©Stampin' Up!
The first thing to check out is the 12" x 12" Divided Page Protector.  They come 10 to a pack, each a different layout to hold a variety of sizes of photos and memorabilia.  Just trim, mount, embellish as desired and slip into each pocket. Voila!

The way that Stampin' Up's inks match our card stock and Designer Series Paper, as well as using the Color Coach tool, takes the guess work out of color coordination.  No fooling!

Did you notice the two brown sections? Both feature our new Natural Composition Specialty paper.  One mats a picture of my darling hubby and me,  and the other is the cover for a little book that would be perfect for journaling, more pictures, you name it.

Stamps are from the fun "You're Amazing" set, and adding just the right amount of bling is a banner of Silver Glimmer paper (glittery without the mess.  oh yes!)

Time to get back to it.
Until the next time, Happy Stampin' and Scrappin'!
Trish

Tuesday, October 2, 2012

AFFECTION COLLECTION in pink

Hi Stampers!
Happy Tuesday and welcome to my blog!

October is --among other things-- Breast Cancer Awareness month.  And pink ribbons everywhere remind us to be sure and have our yearly check up and mammogram. Early detection makes treatment so much better and easier.  Did you know that breast cancer is not a "women's" disease?  Though not in as high a number, it can occur in men as well; so be sure to encourage the guys in your life to get checked out regularly as well.

In recognition of those battling this disease,  let's make another pink card!  It's super simple and oh-so-nice!
Stamp with Trish, image © Stampin' Up!

To make this card, you will need:
  • Affection Collection stamp set
  • Primrose Petals, Whisper White, Basic Black card stock
  • Summer Starfruit, Primrose Petals, Midnight Muse, Basic Black ink pads
  • Scallop Edge Border punch
  • Paper snips, Snail/other adhesive, stapler
I love the collage effect and "Affection Collection" makes it easy to pull off.  And do you see that cute little banner-- very trendy!  You can find this stamp set and other wonderful products in our Holiday catalog, available only through January 2, 2013.  Don't have one?  Contact me today.

Affectionately yours,
Trish


Wednesday, September 26, 2012

HELLO, DOILY in PINK


Hi Stampers,

Continuing with our Pink Week, today's card is CAS (clean and simple), basic supplies and tools, easy technique, goes together quickly, yet the outcome is lovely as can be.

To make this card you will need:
* Hello Doily and Itty Bitty Banners stamp sets
* Rich Razzleberry and Pink Pirouette card stock
* Rich Razzleberry and Versamark ink pads
* Large Oval and Scallop Oval punches
* White embossing powder, Heat Tool
* stampin' sponges, Snail adhesive and stampin' dimensionals

For the card front, use the embossed resist technique.  Here's what you do:
Using Versamark ink, stamp the doily image onto the Pink Pirouette CS, sprinkle with embossing powder, heat to melt with heat tool (Stampin' Up's is the best with 2 heat settings!), then sponge on Rich Razzleberry Ink to highlight, wipe off excess ink with a tissue or paper towel. 

To finish the card:
Mount on card base.  Stamp and mount sentiment tag.  Provide a Pink Pirouette mat with a scallop edge to the inside for your personalized message.  And you are done!

Change out the colors and the sentiment and you can create a rainbow of cards for all sort of occasions in just a little bit of time.

Having a party is a great way to get together with some friends for some creative fun.  Contact me at teachertrish@gmail.com for more details.

Until the next time,  THINK PINK INK.
Trish


Thursday, September 20, 2012

IT'S IN THE BAG

Hi Stampers,

I hope you have been having a great week.  The weather here has been cool and sunny, and I am thanking the Lord for the reprieve from the extreme heat and drought we experienced all summer long.

Today's project is the last one we did at club last Friday.   Who wouldn't be delighted to receiving a little something wrapped up in this gift bag?


Using a paper lunch sack, we stamped the letters using Versamark and the Morning Post stamp set. 
HINT:  stamp your letters from bottom ("Y) to top ("H") to lessen the chance of running out of space before you get to your last letter - don't ask me how I know this <grin>

Send a strip our new Early Espresso sandable card stock through the Big Shot using our Woodgrain embossing folder, and sand to expose its ligher core.  Very spiffy.

HINT:  Sanding System, the Core'dinations card stock in 3 Stampin' Up! exlusive colors, and Dust Buddy are all featured in our Holiday catalog, available for purchase only through Jan 2, 2013)

The Very Vanilla medallion was cut using the Big Shot and the Perfect Pennants bigz L die.  Easy!

Using the Scallop Circle punch, cut 3 layers from Cherry Cobbler and fasten together using a brad.  Scrunch the layers to soften the card stock and add dimension.

Assemble, adding a Linen Thread bow. Fill with your treat (homemade caramel corn? Mmm!) roll down the top a couple of turns, secure with a glue dot. Done!

Until the next time, HAPPY STAMPING!
Trish


Wednesday, September 19, 2012

MORE REFLECTION and HINTS

Hi Stampers,
Thanks for stopping by.

One of my favorite kinds of stamps is the silhouette, and Serene Sihouettes is at the top of my list.  The imagery of each stamp in this set is ever so lovely and definitely a perfect choice when using the Reflections Technique to create a lovely and versatile card.  I must admit this is one of those cards I simply enjoy looking at because it is so peaceful and pretty.  And it goes together ever so quickly.

Color choice makes all the difference in defining the mood of a card.  Here the focal image is stamped in Early Espresso on Whisper White.  So Saffron, Garden Green, Soft Suede (just a touch), Baja Breeze and Not Quite Navy were sponged on to provide color and depth.  Line the inside of the card with another piece of Whisper White sponged lightly with the So Saffron and Baja Breeze.

The card front was cut 3" x 4-1/4" and layered onto the Old Olive card base cut 4" x 10- 1/2" scored at 5-1/4" and mounted onto a So Saffron back mat cut 4 -1/4" X 5-1/2".

Just the right amount of exture is added to the card base using the Framed Tulips embossing folder and the Big Shot.

HINT 1:  The secret to effective sponging is to start with the lightest color, applying the ink somewhat "off page" and then swirling it on gently layer upon layer, until it is just the degree you want.  Then do the same with darker tones.

HINT 2:  Reflection areas on water and ice tend to be lighter in shading than those of the sky.

HINT 3:  Use a mask to help establish horizon line.

And there you go.  A perfect card suitable for all sorts of occasions.  Just add your personal message and it is ready to mail or deliver to someone you want to bless. 

Until the next time,  HAPPY STAMPING!
Trish


Tuesday, September 18, 2012

REFLECTIONS

 Hi Stampers,
Thanks for stopping by.

Last year I taught my clubbers the Reflections/Mirror Image technique in order to produce this lovely winter-scene card.  It reminded all of us of a typical Nebraska winter.

Recently, my hostess-of-the-month asked if we could work on this technique again.

Below is the first card we did last Friday.  This one took us a while.  The technique itself is quite simple: ink and stamp image on card stock; ink again and stamp on the imaging sheet from the Stamp-a-ma-jig; flip imaging sheet over (ink side down), align under or next to first stamped image, and press down with your hand to transfer the ink to the card stock.  It was the details that required a bit more time than we usually spend creating one card - but the results were well worth it, don't you think?

 The card base and trim were done in Always Artichoke, and don't you just love how the Top Note die cut really pulls the eye into the focal image of the trees.  We enjoyed the "art" of adding layers of color to Whisper White card stock using inks, sponges and daubers.  And the Woodgrain background stamp done tone-on-tone in Crumb Cake adds the perfect visual texture.  The inside of the card repeats a portion of the tree image, as does the envelope.  (One of these days I will remember to take pictures of those for you LOL)

 The card below is similar, but with some changes (textured background, faux stitching, die-cut tag).  Which way do you like best?

Tomorrow I will share yet another card using the same technique.

Until then,  KEEP ON STAMPIN'!
Trish

Saturday, September 15, 2012

WHEW!

Hi Stampers!  Thanks for stopping by.

Has it been a week!  Without going into details, suffice it to say, there have been many unexpected occurrences that have kept me out of the craft room and away from my computer.  Prayerfully, the days to come will be calmer.

Tonight was the September gathering of Cheaper than Therapy, the hostess club that meets here in my home.
What a fun group of ladies! I always look forward to getting together with them. This year we have opted for learning and applying 1 technique per meeting; usually we do a practice and make a sample on a printed tutorial, then make two cards using the same techinique.  Sometimes we will squeeze in an extra project that introduces new product.

Here are my gals, just getting started with doing the tutorial.  Are they cute?  


Are here they are showing off this evening's work.

Mary


Karen

Pat 

Linda

Teresa

Deb      

More details about tonight's projects in upcoming posts.

If you would like more information about joining a club or about the products we used, pop me a message at
teachertrish@gmail.com

Looks like beautiful weather is in store for us for the weekend.
Hope your days are sunny and bright.

Until the next time, color your world beautiful!

Trish

Friday, September 7, 2012

TRIPLE TIIME STAMPING

Hi Stampers,

A popular layout these days is the one I am sharing today.  You may be wondering how to get those stamped butterflies to line up like that.   It may look complicated but it is really quite simple.  The name Triple Time Stamping explains it all -- stack and stamp all 3 layers at once, mat each layer and WOW!  


To make this card, you will need:
stamp sets:  Elements of Style, Nature Walk,     Papillion Potpourri
card stock:  Night of Navy, Whisper White
inks:  Night of Navy, Pool Party, So Saffron
tools:  Elegant Butterfly punch
other:  Dazzling Details (for just a touch of sparkle), Snail adhesive, Stampin' dimensionals


I love how the colors and images all work together, and hope you will give this technique a try.  

Inkingly yours,
Trish

Tuesday, September 4, 2012

FREE RIBBON all month long

Hi Stampers!

No card today, but wanted to share this cute video. Be sure to watch:

WILL IT EMBELLISH?
https://www.youtube.com/watch?v=s32E7X6IGl8&feature=player_embedded


Then head over to my website   www.trishhernanez.stampinup.net  to check out the colorful details on how you can get FREE ribbon.

Happy Tuesday!
Trish

Thursday, August 30, 2012

WEDDING WISHES

Hi Stampers,
Recently a friend told me she needed cards for 3 upcoming weddings. We spent yesterday morning visiting and crafting.  Her end cards are like the one below. Inside we added a designer strip to hold a gift card added another piece of vanilla card stock for her stamped and personalized message to each couple.

Stamp with Trish, www.teachertrish@gmail.com


For this card we used:  Bashful Blue, Night of Navy, Basic Gray, and Very Vanilla card stock; Night of Navy classic ink pad; Petite Pairs stamp set; Perfect Polka Dots textured impressions folder; Big Shot; stampin' dimensionals; Paper Piercer and mat; 1/2", Ribbon, Scallop Oval and Large Oval punches and the Mini Punch pack.  Put them all together and VOILA! a beautiful card, easily reproduced.  Changing out the colors to match those of the wedding adds a most personalized touch.

What do you think?

Craftingly yours,
Trish


Monday, August 27, 2012

PERFECTLY PRESERVED

Hi Stampers!
Hope your weekend was a lovely one.  We were visited with rain both Friday and Saturday, which was a welcome relief in the midst of the drought, but yesterday the sun and the heat returned and the AC went back on.  Someday, autumn will come.

In the meantime, I can dream of canning and make cards like this one my club did recently featuring our Perfectly Preserved stamp set from the Holiday Catalog.

The jar, cap, pear and leaf were all die cut using our new Cannery framelits and the Big Shot.

The paper strips are from our Orchard Harvest designer series paper pack.  Stampin' Up!'s coordinated inks, papers, stamps and dies makes designing cards and crafts fun and easy.  Here I used More Mustard, Lucky Limeade, Raspberry Ripple, Early Espresso, and Whisper White.

A little bow of  white Baker's Twine and your card is good to go.  Love it!


Be sure to visit my website for more great crafting ideas.

Until the next time,  happy stamping!
Trish


Wednesday, August 22, 2012

more MOVING FORWARD

In my last post, I mentioned how crazy I am about this great little set, Moving Forward.  In all, I have created 10 different cards, which is like a record for me! If your email does not automatically display the pictures, be sure to click on the blue title at the top of the post.  Wouldn't  want you to miss out on any of the good stuff!

Notice the similarity in the layouts? Little changes make for totally different looks.


 Stamp with Trish ©Stampin' Up!    
Bright colors (Tangerine Tango, Tempting Turquoise card stock and markers, and Summer Smooches designer series paper) make this card a delight for young and old alike.  Look carefully. Did you spot the Mini Silver brad that gives the card just a little touch of shine and texture?


Stamp with Trish ©Stampin' Up!


Who wouldn't feel better after receiving this cute card?  Just basic card stock ( Midnight Muse, Gumball Green, Whisper White) and Stampin' Write markers (Midnight Muse, Summer Starfruit, Gumball Green) convey your get well wishes.
Add great texture and interest to the band using the Adorning Accents Folder and the Big Shot, along with the Scallop Edge Border punch.  A Mini Silver brad at the top of the mast and that sweet little Primrose Petals heart (Owl Builder punch) and your card is done.

I am just crazy about stamp sets with built-in versatility!
Maybe one of these two cards will show up in my next $10 class.  There is still time to sign up for the Aug 31 session.  Email me for details

Thanks for checking in and until the next time....... Keep on stampin'!
Trish

Monday, August 20, 2012

MOVING FORWARD

Moving Forward wood mount set:  $19.95, clear mount stamps $14.95 (mounts sold separately)


Have you taken a look at the Moving Forward stamp set featured in the 2012-2013 Stampin' Up! catalog, p. 209?  So cute! and great for both adult and kiddie cards!  I have been playing with this set and having a great time. This exclusive set is available only this year and was designed with a purpose -- to raise money in support of the Ronald McDonald House Charities. This year Stampin' Up! will donate $3 to RMHC for each Moving Forward set sold.  Together we can make a difference.
My next $10 class will offer 3 cards featuring images from this set. All materials, tools and supplies will be provided.  Want to know how to take the class for FREE?  Read on....

  • class dates:  Friday Aug 24  OR Friday Aug 31,  7-9:30 pm
  • class time:  7-9:30 pm
  • class size: limited to 5
  • RSVP to teachertrish@gmail.com  no later than Wednesday before class to ensure your spot
  • cost $10 or FREE with your order of $25 (not including tax & shipping) the night of class
If you take the class and order the set, you will have some great samples on hand when your set arrives! AND you will be help to make a difference in the lives of others while having some fun as well.

Enough with talking.  Let's see some samples of what you might be working on in the class:


So check you calendars, call your friends, and get back to me soon about which session you would like to attend.  If neither of those dates works, let put out heads together and find one that does.

Looking forward to seeing you soon,

Trish