Friday, November 30, 2012

ENTER TO WIN

Hi Stampers!

If you have never tried digital crafting and are hesitant to invest in something you are not sure you will even like, why not enter Stampin' Up!'s FREE give-away contest for a chance to win  MDS (My Digital Studio) products.

Here are the details:

Mega Massive My Digital Studio Giveaway

November 30, 2012 Win a copy of MDS 2+ and EVERY SINGLE digital download My Digital Studio releases in 2013-a $1600 value! We'll also give out 10 first-place prizes and a bonus prize for everybody who enters the contest if we get at least 10,000 people.
Go to  facebook.com/mydigitalstudio to enter from December 1-29, 2012. You can enter once a day every day of the contest. Woohoo!  Tell everybody you know to do the same!

Let me know if you win :)
Trish

Thursday, November 29, 2012

GLITTER ORNAMENTS

Hi Stampers!

Do you love the look of sparkly ornaments on your Christmas tree but hate how the glitter flakes off  leaving a lovely trail behind that just never seems to go away?  This quick and easy project may be just the thing for you -- all the glitz without the mess!

See how pretty these ornaments look even on my dry erase board.  Imagine how lovely they will look on your tree!

Here's all you need to do to create your own Glitter Oraments:
1.  Round up supplies:  clear glass ornaments, glitter, stamp pad reinker, small funnel
2.  Remove the silver cap from the ornament and set aside.
3.  Add 15-20 drops of reinker in the color of your choice to the inside of ornament.
4.  Swirl the ink around until the entire inside is covered with ink; drain out excess.
5.  Using the funnel, add glitter in the color of your choice  and shake to cover the inside of the ornament with the sparkly stuff.  (Be sure to cover the hole with your thumb while you are shaking.)  Pour out the excess glitter.
6.  Recap the ornament.
7.  Hang on tree with cord, string, or hook.

This is a fun project for young and old alike.  Different grits of glitter produce different effects; I really like the coverage that the fine glitters provide.  The ink and the glitter do not have to be identical; mix it up to see what cool effects you get.

Ornaments make great gifts.  These will slip perfectly into Stampin' Up's food-safe Kraft Gift Boxes (2012-2012 Catalog, p. 161).

Give Glitter Ornaments a try and let me know what you think.

Happy stamping and more!
Trish


Wednesday, November 28, 2012

Of BOYS & BANNERS

Hi Stampers!
Last week Lou and I were in Colorado visiting our son Patrick's family.  He and his wife Theresa have 3 sons who all love to craft, which delights this stampin' granny.   So craft we did, in between playing games (that's Kevin and Brett below), eating (oh my was it ever delicious!), shopping, going to see "Wreck-It Ralph" (cute movie with lots of value messages), and overall just enjoying being with each other.


To add a little harvest color to the dining area  Kev, Patrick and I created a beautiful banner featuring pennants, leaves and pinecones all fashioned from card stock and designer paper.  We had so much fun making it, and the whole family not only enjoyed it but was reminded to indeed "give thanks" to our Lord Almighty for all His benefits and blessings.

I didn't have anything to steady the camera while taking pictures of the wall, so they are a little blurry, but I think you will get the idea.  The boys did a great job!

Every day is a perfect day for giving thanks.

Happy stamping!
Trish

Friday, November 23, 2012

IT'S THE LITTLE THINGS


Hi Stampers!

A gift doesn't have to cost a lot.  In fact, the best ones are those with a personal touch.
Today we are going to check out 3 different little gifts that you can make for all those you would like to do something just a little special.

Aren't they adorable?

The mug holds a packet of hot cocoa, but specialty coffee or tea would work just as well.  This project requires a lot of pre-scoring, but the Simply Scored makes that job a breeze.  You can find it in the 2012-2013 catalog on p.181.  Colors were added to the mug images (Morning Cup set) using Stampin' Write markers. 

Open up the Gingerbread "Book" to find a fresh box of Tic Tacs.  Making the little guy was simply a matter of stamping (Scentsational Season set) and running through the Big Shot using the Holiday Collections framelits.

The reindeer works up really quickly using the Two-Tags dies to cut the base image and circle punches for eyes and nose.

For more information or to schedule a class,  please  EMAIL me
I look forward to  helping you create some little gifts that are sure to please.

Until the next time,
Trish


Wednesday, November 21, 2012

FOR MY FRIEND


Hi Stampers!
What a treat it can be and a lift to the spirits to receive and unexpected card in the mail -- especially from a friend.

Today's post is the 1st of 3 cards made at this month's stamping club (we call it "Cheaper than Therapy" and it is!)

I love cards that use materials I have readily available, require a minimum of tools and go together quickly and easily.  This one fits the bill.  (note:  The colors in the card are much prettier and truer my photo shows. For example, the little vase is stamped in Crumb Cake and matches the card base, which is plain not mottled. )

Images ©Stampin' Up! 1990-2012
Simple stamping, cuts and punches and this card goes together in a snap.

To make one, you will need:
STAMP SETS:  Bright Blossoms, Friendly Phrases
PAPER: Crumb Cake, Soft Suede Whisper White card stock; Polka Dot Parade designer series paper
INKS:  Crumb Cake, Soft Suede
PUNCHES:  1-3/4" Circle, 2-3/8" Scallop Circle, Punch Pack
ETC:  Rhinestones, Real Red 1/4" Stitched Grosgrain ribbon, Stampin' Dimensionals, Mini Glue Dots

And it's ready for your personal message inside.

More from Club in my next post.  Until then,

Hapy Stampin'!
Trish

Tuesday, November 20, 2012

OH DEER!

Hi Stampers!
Are you ready for another quick and easy card?  Again Cheaper than Therapy had a blast putting this one together in record time.


Here's how to do it:
Send the Cherry Cobbler mat through the Big Shot using the Argyle Textured Impressions embossing folder.
Using mini glue dots, secure the Gumball Green Stitched Satin Ribbon across the middle of the mat.
Attach the mat to the Whisper White card base using Tombo Mono Multi Liquid Glue.
Stamp sentiment from Greeting of the Season in Cherry Cobbler on Snow Festival Designer Printed Tag.
Adhere tag to card using Tombo glue.
Ink one small Pearl with Red Sharpie Pen and attach on the reindeer's nose.
 Done!

Those Snow Festival Designer Printed Tags are featured on p.12 of the Holiday catalog.  There are 25 double-sided tags, 5 ea. of 5 designs per pack.  Fun to use as is or to embellish and a great buy at only $3.95.

A final note:  as you probably have noticed, I am having issues with either my camera or the photo editing program on my computer.  I so very much appreciate your patience as i try to get the kinks worked out.

If I can be of any help to you in your paper crafting, please be sure to EMAIL ME HERE

Happy Stampin'!
Trish

Monday, November 19, 2012

ALL PRESENT!

Hi Stampers,
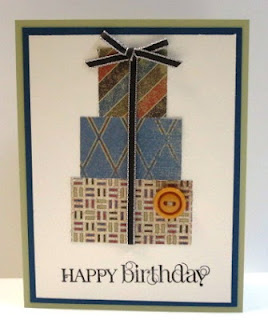
Today's share is the final card from November's Cheaper than Therapy club meeting.  Like the others this week, it's another quick and easy card.  While the example below uses the retired designer series paper Well Worn, it can easily be changed up using scraps in colors that work well together. 

Images © Stampin' Up! 1990-2012

Tips to make it easy:
1.  Stamp the greeting in Early Espreeso ink on the Very Vanilla card front.
2.  Using SNAIL, adhere card front, Not Quite Navy mat and River Rock card base together.
3.  To make the ribbon lie down smoothly, tuck one end under the center of the largest piece of DSP and secure with a mini glue dot; then adhere the 3 pieces of DSP to the Whisper White largest to smallest as shown.  Secure free end of ribbon to top piece of DSP with a mini glue dot.  Use another glue dot to attach bow.
4.  Attach button with glue dot with a mini glue dot.

Wouldn't this be a great card design for a Christmas card, or for a baby shower, or a wedding or.....?

Until the next time,
Happy Stampin'!
Trish

Saturday, November 17, 2012

ONLINE EXTRAVAGANZA


The Online Extravaganza promotion is our biggest online sale of the year! We want to make it easier for you to get sales during a time when lots of people are doing their holiday shopping, but not necessarily holding Stampin' Up! parties. So during these 10 days only, you  can get incredible discounts-up to 50 percent-on some of your favorite products!

 In addition, there will be three products 20 percent off for 24-hours only on both the first and last days of Online Extravaganza-our very own doorbusters! Woot!

Starting Monday, visit my online store to see all the fabulous deals --  just click  HERE , then click on SHOP NOW

Happy Stampin'!
Trish

Thursday, November 15, 2012

TAGS

Hi Stampers!

Today we will take a look at some delightful tags for your upcoming gift giving. 

Images ©Stampin' Up! 1990-2012
Our designs feature the stamps from Joyous Celebrations (Holiday catalog) and Chock Full of Cheer.
CS::  Cherry Cobbler, Gumball Green, Early Espresso, Very Vanilla
DSP: Be of Good Cheer
PUNCHES:  Lg. Oval, XL Oval, Scallop Oval, 1-1/4" Scallop Circle, 1-3/8" Circle
EXTRA TOUCHES:  Cherry Cobbler Baker's Twine, small Pearl Jewel

Did you catch that the reindeer's nose is red?  Our pearls can easily be color coordinated to any project with just a touch of a Sharpie pen ink.  (The technique works with our Rhinestones, too!)

 Happy Stampin'!
Trish


Wednesday, November 14, 2012

SNOWFLAKES ILLUMINATED

Hi Stampers!
I love the effect created using the Triple Time Stamping technique.  Today's post is a beautiful example.

Images © Stampin' Up! 1990-2013


With just a minimal amount of supplies you can create this card:
Sahara Sand, Midnight Muse card stock
Snow Swirled stamp set
Illuminate, Versamark ink pads
Silver embossing powder
Heat tool
adhesive

The Illuminate ink is a new product (available in our Holiday catalog, p. 23 through Jan 2).  It is a special watermark ink which makes each snowflake shimmer.  Lovely!

Happy Stampin'!
Trish

Tuesday, November 13, 2012

NEW on the STAMPIN' SCENE


Hi Stampers!
Have you heard about Stampin' Up's new paper trimmer and have wondered just what is so special about it?

Check out the features here : STAMPIN' TRIMMER

Want to check it out personally?  Give me a call or email me so we can arrange a "play date".

Until the next time, keep on stampin'!
Trish


Monday, November 12, 2012

FRENCH FOLIAGE WREATH card

Hi Stampers!
I told you my downline Ashley is most clever.  Here's another card we offered at Christmas Cards & More last week, repurposing one of the leaves from the French Foliage stamp set to create this beautiful Gumball Green wreath.  See those Cherry Cobbler berries?  Those were made using the "slash" stamp from the same set, sparkled up with little dabs of Dazzling Details.  Add the sentiment from the Christmas Lodge set and a Cherry Cobbler seam binding bow for the perfect finishing touches.

Images ©Stampin' Up 1990-2012

Happy Stampin'!
Trish

ARTISTIC ORNAMENT card

Hi Stampers!
My apologies if my blog comes to you twice today: while editing I hit the wrong button. OOPS!

I hope your weekend was every bit of wonderful!  Here in eastern Nebraska we basked in temps in the low 80's on Saturday and shivered our way to church Sunday morning and all day for that matter in the low 30's.
Such extreme temperature variations are not all that unusual here and residents here are expert in the art of layering up to deal with them.

On to crafting and stamping :  my downline Ashley Weaver does not own very many stamp sets dedicated to Christmas, so she comes up with very clever "repurposing"of other stamp sets to meet her need, like in the card below.  This is one of the many projects the ladies did at last week's Christmas Cards & More event, and they loved it!

Image ©Stampin' Up! 1990-2012
It features Artistic Etchings; notice how the crown is embossed in silver and turned upside down to create the ornament cap?  Very clever indeed.  Other added touches included the Elegant Eggplant mat run through the Big Shot with the Petals-a-Plenty embossing folder; Rhinestones for bling; and sentiment from Teeny Tiny Wishes.

Happy Stampin'
Trish


Tuesday, November 6, 2012

 Hi Stampers!
Wow! What a great time my downline Ashley and I had with our guests at "Christmas Cards & More" on Saturday.  Everyone said they had a wonderful time, were impressed with the variety of our projects as well as the great value and low cost, and savored some excellent Taco Soup (Ashley's recipe) and other yummy food.  And they left looking forward to "the next time".

We were so busy that day that I didn't get many pictures taken, but here's one of the lovely Robin modeling her use for the paper ornaments our guests learned to make.  I love how my ladies always find ways to add their own personal touch!


Here's a closer view of that Designer Series Paper ornament and the candle stamping project  using the Snowflake Soiree set:

Have you ever wondered where Stampin' Up! demonstrators get their ideas for cards and other projects?  One of our resources is Stampin' Success, a magazine for demonstrators only.  If you would like a peek at a few of the pages from our most current issue, just open this link  a taste of Stampin' Success

Over the next several posts, I will share some of the other projects from Saturday's get together.
Until the next time,

Happy Stampin'!
Trish

Monday, November 5, 2012

ALTERED LUNCH BAG


Hi Stampers,
I hope you had a super weekend.
Today's share is a great little project easily changed up for just about any event or celebration.


Who doesn't love getting something free?  How about an entire color collection of Stampin' Up! ink pads?
To find out how, visit my website by clicking  HERE

Wishing you a color-filled day,
Trish